Showing posts with label video. Show all posts

Mushroom Rice

A Mushroom Rice all made in one pot! Tip: stir through half the browned mushrooms at the end for maximum flavour. www.recipetineats.com
Mushroom Rice
Prep Time
10 mins
Cook Time
20 mins
Total Time
30 mins
One for mushroom lovers! Worthy of being a meal in its own right, my two key tips to make an extra tasty mushroom rice are: 1) stir in half the browned mushrooms at the end 2) brown the mushrooms well so the base of the pot turns brown, then deglaze it with broth so all that flavour ends up in the rice as well as staining it a lovely earthy brown colour. The amount of liquid to rice ratio I use yields a tender just cooked rice that is fluffy. Recipe VIDEO below. Serves 4 -5 as a main or 8 as a side.
Servings: 4 - 8 people
Calories: 261 kcal
 
Ingredients
  • 2 - 3 tbsp olive oil , separated
  • 30 g / 2 tbsp butter
  • 750 g / 1.5 lb mushrooms , sliced 3 - 5 mm / 1/8 - 1/5" thick (Note 1)
  • 2 garlic cloves , minced
  • 1 small onion , finely diced
  • 1 1/2 cups long grain rice (Note 2)
  • 2 1/4 cups / 565 ml vegetable stock / broth (or chicken) (Note 3)
  • 1 1/2 - 2 cups sliced green onion / scallions
  • Optional: More butter to stir through
Instructions
  1. Heat 2 tbsp oil in a large pot over high heat. Add half the mushrooms, and cook for 5 minutes until golden. Season with salt and pepper then remove and set aside.
  2. If the pot is dry, another 1/2 - 1 tbsp oil, and add butter. When melted, add onions and garlic.
  3. Cook for 30 seconds, then add remaining mushrooms. Cook for 5 minutes or until mushrooms are lightly browned (they won't caramelise as well as the first batch) and the base of the pot is brown.
  4. Add rice and a splash of broth. Mix so the brown stuff on the bottom of the pot mixes into the liquid. (Video below helpful here)
  5. Once the base of the pot is clean, add remaining liquid. Place lid on, bring to a simmer then turn down to medium low.
  6. Cook for 15 minutes or until there is no residual liquid (tilt pot to check).
  7. Remove from stove, remove lid, QUICKLY toss in reserved mushrooms and scallions, put lid back on. Leave for 10 minutes (do not skip this step!).
  8. Fluff rice using a fork or wooden spoon. OPTIONAL: Stir through more butter. 🙂 Serve!
Recipe Notes
1. Use any mushrooms you want, I used normal button mushrooms, it's even more mushroomy if you use Swiss Brown / Cremini mushrooms. Don't slice them too thin otherwise they literally disintegrate!

Mushrooms do "suck up" oil but don't be tempted to add more oil until the end if needed. When raw, mushrooms suck up the oil, but then as they cook, release water and the oil, so this helps them brown towards the end. But if you do find they are looking dry, add just 1 tsp towards the end of browning.

2. Basmati and jasmine would also be great here, comes out nice and fluffy like long grain rice. I find that medium and short grain rice is a bit sticky for my taste when cooked pilaf style. Risotto rice, sushi rice and paella rice are not suitable. Please use uncooked rice.

BROWN RICE: Follow recipe but use 2 1/2 cups liquid for tender, fluffy rice (or 2 3/4 cups for soft rice) and it will take around 45 minutes to cook on the stove (check at 35 minutes, then every 5 minutes until liquid is absorbed).

QUIONA: This will also work with quinoa but adjust the recipe as follows: rinse quinoa, use 3 cups of liquid (I would prob do 2 cups broth, 1 cup water), follow recipe but cook for 20 minutes.

3. The amount of liquid to rice ratio I use yields a tender just cooked rice that is fluffy. If you like your rice on the soft side, use 1/2 cup extra liquid but note that the rice will be stickier rather than fluffy like what you see in the video and photos.

4. SERVES: Makes around 7 cups of rice (packed) which will serve 8 as a side or 4 as a main. YES it's a lot but it will keep well in the fridge for a few days and it freezes well too!

5. Nutrition per serving, assuming 8 servings.
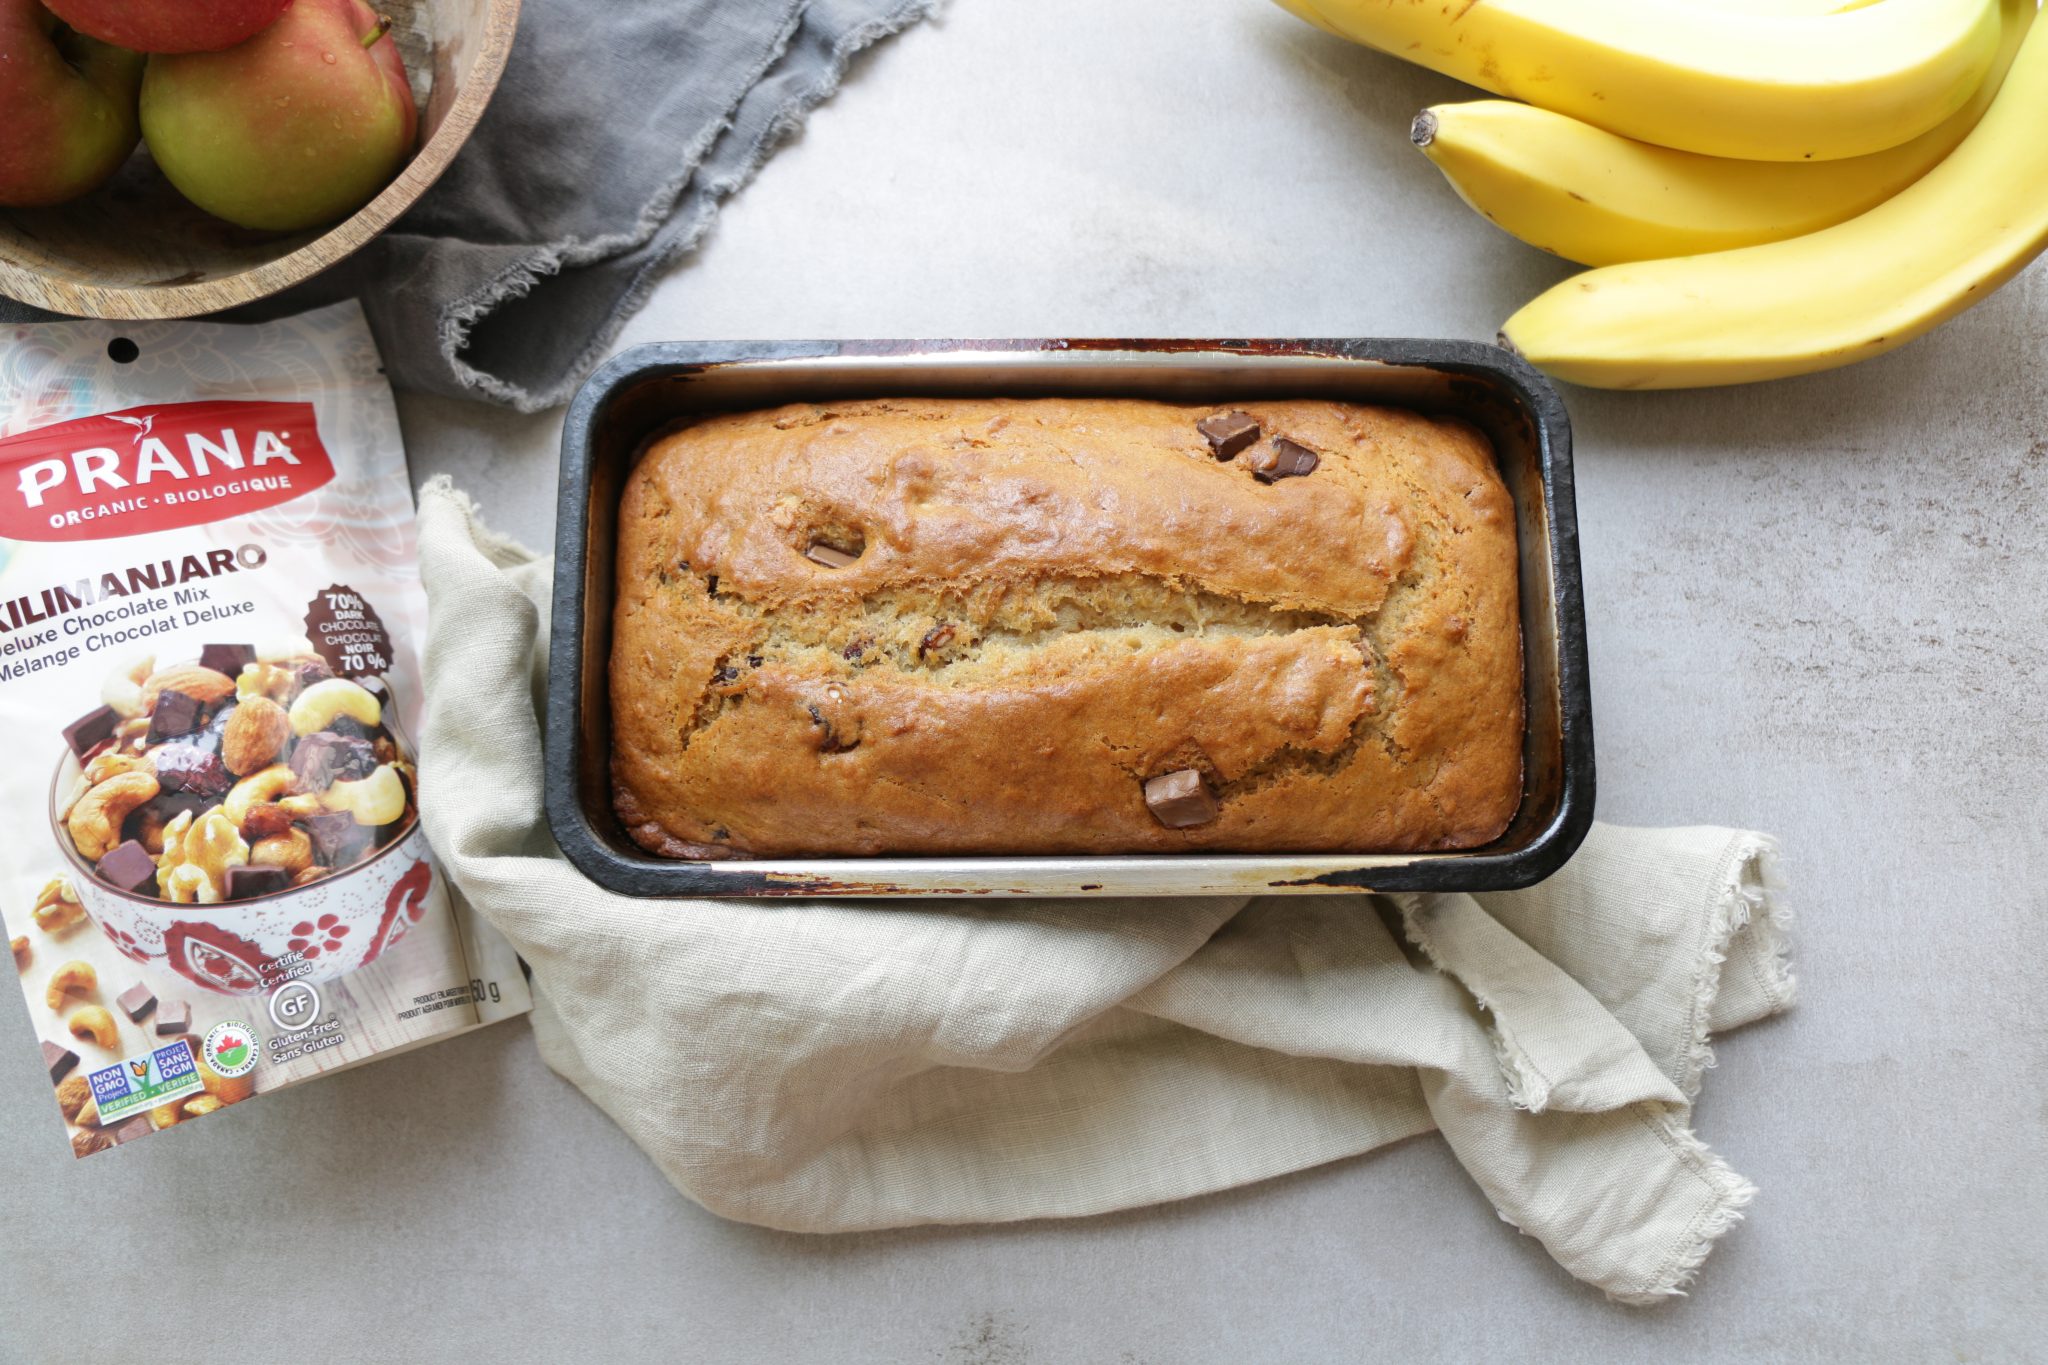
Banana Bread


Ingredients

SEE INGREDIENTS & VIDEO HERE!

Directions

1
Preheat the oven to 350 ° F / 180 ° C.
2
Oil a 23 x 13 cm (9 x 5) bread pan.
3
In a bowl whisk together the bananas, lemon juice, vegetable oil, soy milk
4
and brown sugar until smooth. Set aside.
5
In a separate bowl, combine flour, salt, baking powder, baking soda and kilimanjaro mix.
6
Add the dry ingredients to the wet and to stir as little as possible.
7
Spread the batter in the prepared pan.
8
Bake for about 45 minutes or until a toothpick inserted in the center comes
9
out clean.
10
Let cool completely on a wire rack before removing from the pan. Cut into slices.

Vegan Potstickers

Delicious vegan potstickers. Don't be intimidated, they're easy! You can even make your own wonton wrappers to be sure that they are free from all animal products.
 
Serves 25 potstickers
Vegan Potstickers

60 minPrep Time
10 minCook Time
1 hr, 10 Total Time

    Ingredients
  • 25 vegan wonton wrappers (see note)
  • 2 tablespoons oil, divided
  • Half an onion, chopped
  • 2 cloves of garlic, minced
  • 1 tablespoons minced ginger
  • 3/4 cup chopped mushrooms (Asian mix or oyster or shiitake or white button)
  • 1 carrot, grated
  • 1 cup shredded cabbage
  • 1/2 cup chopped green onions
  • Salt and pepper to taste
  • 1 teaspoon sesame oil
  • Water for steaming
  • 1/4 cup soy sauce
  • 2 tablespoons rice vinegar
    Instructions
  1. Heat 1 tablespoon of oil in a large pan over medium-high heat. Add the chopped onion and white parts of the green onions and fry until softened. Add the garlic and ginger and fry until fragrant – about 2 minutes. Add the mushrooms and fry for a further 5 minutes or until soft and beginning to brown. Add the carrot, cabbage, green parts of the green onion, salt and pepper and fry, stirring, until the cabbage is soft but not limp – about 2 to 3 minutes. Remove from heat and stir thorough the sesame oil. Allow to cool on the counter or in the fridge.
  2. Once cool, assemble your potstickers. Place a small teaspoon of the filling in the centre of a wonton wrapper. Wet the edges of the wrapper with water. Fold the wrapper over the filling and pinch the edges together to seal. Place them upright on a plate, being careful not to let them touch or else they will stick together.
  3. Heat 1 tablespoon of oil over medium-high heat in a large pan. Add the potstickers and fry until browned on the bottom – 1 to 2 minutes. You may need to work in two batches if not all your potstickers fit in the pan. Add 1/4 cup of water, cover the pan and reduce heat to medium. Allow to steam until the tops are tender and the water has evaporated – about 2 to 3 minutes. Uncover the pan and flip the potstickers onto their sides to brown on each side (optional). Remove to a serving dish.
  4. In a bowl combine the soy sauce and rice vinegar to make a dipping sauce and serve alongside the potstickers.

Note: Use store bought or make your own with this recipe.

Healthy Sweet Potato Breakfast Brownies

https://i0.wp.com/thebigmansworld.com/wp-content/uploads/2017/04/4-ingredient-flourless-double-chocolate-protein-brownies-paleo-vegan-glutenfree.jpg?w=680&ssl=1

Healthy Sweet Potato Breakfast Brownies

CLICK HERE FOR THE VIDEO!

Thick, chewy and super fudgy brownies made with just five healthy ingredients and designed specifically for breakfast! These healthy sweet potato breakfast brownies are completely paleo, vegan, gluten free, sugar free and packed with protein!

Course Breakfast, Dessert, Snack
Prep Time 5 minutes
Total Time 20 minutes
Servings 8 servings
Calories 122 kcal
Author Arman

Ingredients

Instructions

  1. Preheat the oven the 350 degrees fahrenheit and lightly grease a small loaf pan (thicker brownies) or 8 x 8 inch pan (perfect for thicker frosting) and set aside. 
  2. In a large mixing bowl, combine all your ingredients and mix until fully incorporated. Pour into the greased pan and bake for 20-22 minutes, or until a skewer just comes out clean.
  3. Remove from oven and allow to cool in the pan completely. 
  4. While brownies are cooling, prep your frosting of choice- See above the recipe card for the options (protein packed, coconut cream ganache, a chocolate bar of choice or homemade Nutella). Once brownies are cooled, frost and cut into pieces. 

Recipe Notes

* Ensure sweet potatoes are completely pureed, otherwise your brownies will have clumps.
** See notes above for the 4 options- For easiest option, simply melt your favorite chocolate bar over it. Alternatively, you can omit completely.
Because these brownies contain no eggs, you can remove them from the oven earlier than before they are done- They will be ultra fudgy this way.
Brownies need to be kept refrigerated and are freezer friendly.

Skinny Vegetable Soup

Weight Loss Vegetable Soup Recipe

This Weight Loss Vegetable Soup Recipe is one of our favorites!  Completely loaded with veggies and flavor and naturally low in fat and calories it’s the perfect lunch, snack or starter!


Ingredients:

  • 1 small onion , diced
  • 2 cloves garlic , minced
  • 1 cup diced carrots
  • 4 cups chopped cabbage (approx. 1/4 head of cabbage)
  • 1 cup green beans (1″ pieces)
  • 2 whole bell peppers , chopped
  • 1 can (28 oz) low sodium diced tomatoes
  • 6 cups low sodium beef broth
  • 2 tablespoons tomato paste
  • 2 bay leaves
  • 1/2 teaspoon each thyme & basil
  • pepper to taste
  • 2 cups broccoli florets
  • 2 cups sliced zucchini

Directions:

  1. In a large pot cook onion & garlic over medium heat until slightly softened.
  2. Add carrots, cabbage & green beans and cook an additional 5 minutes.
  3. Stir in bell peppers, undrained tomatoes, broth, tomato paste, bay leaves and seasonings. Simmer 6-7 minutes.
  4. Add in zucchini & broccoli. Simmer an additional 5 minutes or until softened.
  5. Remove bay leaves before serving.

Vegan Umami Broth


Roasting the vegetables along with a trio of umami-rich ingredients (miso, mushrooms, and kombu) give this meat-free broth a deep, satisfying flavor that can be used in a variety of soups or braises. You can even sip it on its own or top it with scallions and fresh chiles.


Ingredients

Makes about 2 quarts
  • 3 tablespoons white miso
  • 2 tablespoons vegetable oil
  • 8 dried shiitake mushrooms
  • 4 6x4-inch pieces kombu
  • 2 medium onions, unpeeled, halved through root, very thinly sliced
  • 1 medium carrot, unpeeled, very thinly sliced
  • 1 celery stalk, thinly sliced
  • 1 head of garlic, halved crosswise
  • 6 sprigs parsley
  • 1 teaspoon black peppercorns


Preparation

  1. Preheat oven to 300º. Whisk miso, oil, and 2 Tbsp. water in a small bowl. Crush mushrooms and kombu with your hands over a rimmed baking sheet. Add onions, carrot, celery, garlic, and parsley and toss to combine. Drizzle miso mixture over vegetable mixture and toss to coat. Bake, tossing halfway through, until vegetables are slightly shriveled and mixture is fragrant, 60–75 minutes.
  2. Transfer vegetable mixture to a large pot. Add peppercorns and 4 quarts cold water. Bring to a boil, then reduce heat and simmer, uncovered and stirring occasionally, until broth is reduced by half, 60–75.
  3. Let broth cool, then strain through a fine-mesh sieve into a large bowl, pressing on solids to extract as much liquid as possible; discard solids.

Do Ahead: Broth can be made 3 days ahead. Let cool; cover and chill, or freeze up to 3 months.

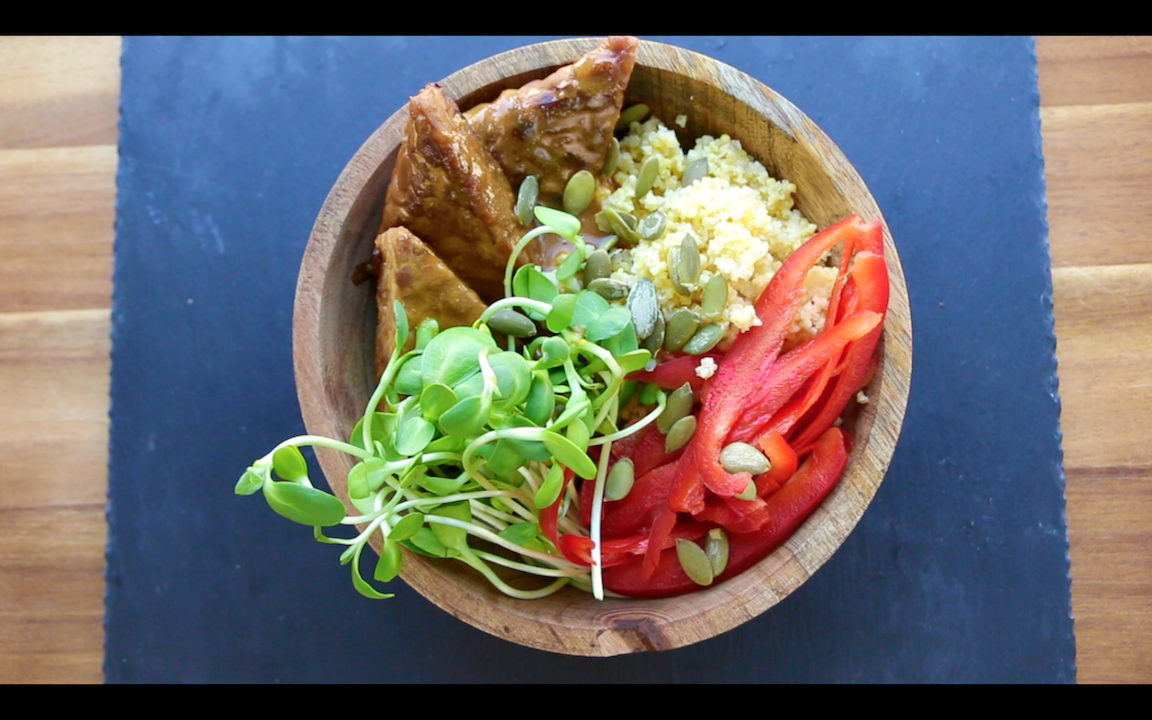
Dragon Bowl


Ingredients

See: https://www.thebuddhistchef.com/recipe/dragon-bowl/

Directions

1
In a bowl, combine the toasted sesame oil, soy sauce, maple syrup and vegetable broth.
2
Cut the tempeh into triangles and place in a pan. Pour the vegetable broth mixture over the tempeh. Simmer on high heat, until the broth is absorbed, about 15 minutes.
3
Sauce: Combine maple syrup, vegetable oil, powdered garlic, soy sauce and nutritional yeast. Mix well. If too thick add a little water.
4
Serve in a bowl along with quinoa, sunflower sprouts, minced red pepper and garnish with pumpkin seeds.

SCHOOL & WORK LUNCH IDEAS » healthy + easy


Figuring out what to pack for lunch and take for snacks can be a source of stress.

... but not if you know what you'll making in advance! Try any of these 3 different lunch box sets (each includes an afternoon snack) to keep you nourished and energized so you can focus on tasks at hand. 

For each lunch, we try to include at least 3 of the 4 food groups:
 
  1. Fruits & vegetables
  2. Whole grains
  3. Plant-based proteins (beans, lentils, nuts, seeds)
  4. Plant-based dairy alternative (not included in any of these recipes - but included in the previous breakfast meal ideas post)

Featured Recipes


Watch the Video

UN-COMPLICATE BREAKFAST » 5-minute breakfast ideas [Video]


As a dietitian and nutritionist, I'm always recommending fiber, fiber, fiber for breakfast. This can be in the form of whole grains, nuts and seeds, and especially fruits and vegetables. I also recommend having about 1-2 Tbsp of ground flaxseeds, chia seeds, hemp hearts, or walnuts for a healthy dose of omega-3 fats.


"What I Wish Someone Had Told Me In Medical School About Nutrition" [YouTube Video]

Presenter: Dr. Michael Klaper


Key take-away points:
  • Eat food that is whole and not processed.
  • Chew food to a cream to allow for easier digestion and absorption of nutrients.
  • Assure mineral availability by doing the following:
    • Soak legumes/nuts overnight before cooking
    • Sprout beans, grains, nuts, and seeds
    • Cook soups and stews to liberate minerals into the broth
  • Increase nutritional absorption of nutrients in your body by cooking wisely 
    • Iron -- Added Vitamin C, for example: squeeze a lemon over your salad, add mandarin orange slices to the salad. (For growing children, pregnancy, anemias, etc.)
    • Zinc -- Saute vegetables with onion and garlic. 
    • Magnesium - After cutting dark, leafy greens, let them sit on the cutting board for 5-10 minutes to allow phytonutrients to develop. Do this before cooking them.
  • Assure mineral availability by doing the following:
  • Include Iodine in your diet to cover thyroid needs.
    • Add a pinch (not too much!) of iodized salt to sprinkle over ready-to-eat food.
    • Japanese seaweeds, which can be added onto soups:
      • Arame: 1 T 2-3x/week
      • Wakame (Alaria): 1 T 2-3x/week
      • Dulse: 1 tsp 2-3x/week
      • Kelp: be cautious and sprinkle little bits only; do NOT use Hijiki (arsenic)!
  • Include the following daily vitamins: Vitamin D, Vitamin B12, Iodine.

copyright © . all rights reserved. designed by Color and Code

grid layout coding by helpblogger.com